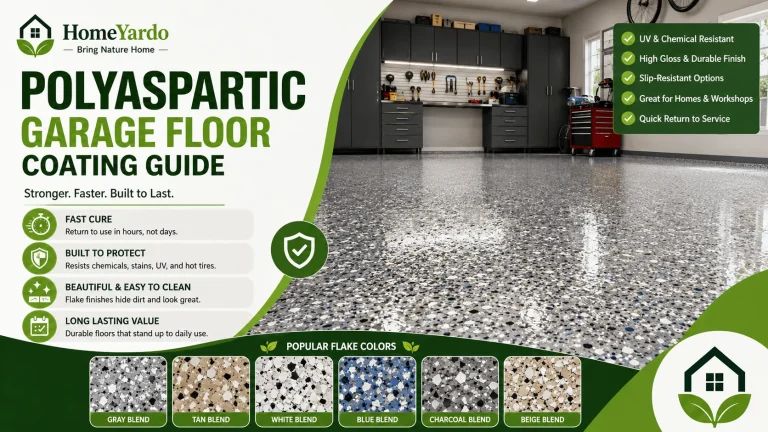
How to Epoxy Garage Floor Correctly: Prep, Installation, Cure Time & Tips

Concrete floors in garages can be made attractive, clean and tough with epoxy coating. And it can be garage stain resistant when properly coated.
It is important to be ready. Poor concrete mixing or drying, grease, dirt, moisture or existing paint/sealer, or lifting, blistering, stickiness or tire marks can cause these.
This guide will help you know how to apply an epoxy floor, the costs, types of coatings, do-it-yourself kits, if you need a professional, flaking, topcoats, troubleshooting, and maintenance.
Quick Answer: How Do You Epoxy a Garage Floor?
Garage epoxy installation involves removing all objects from the garage, sweeping it, degreasing the concrete, patching cracks and pits, checking for moisture, etching or grinding the concrete slab, drying the concrete, mixing and applying the epoxy within the working time of the product.
Epoxy garage floor with flakes may be added to the wet coating and a clear topcoat may be applied after the basecoat is ready to be recoated. Avoid driving on the floor until the product is completely cured, as per the product label.
A typical DIY epoxy garage floor project takes 2-4 days to go from cleaning to light use. Return time will depend on the epoxy system, temperature, humidity, thickness and the instructions on the product label.
Project Duration At A Glance

A garage epoxy project isn’t just the day that the coating is applied. The coating step may be the longest part of the process, as cleaning, drying, repair and curing can take longer.
| Project Phase | Typical Time | Notes |
|---|---|---|
| Empty and clean | Half day to 1 day | Heavy oil stains can take longer |
| Repair and prep | 1 day or more | Depends on cracks, pits, sealer, and old coating |
| Dry after washing or etching | 24 hours to several days | Humid or cool garages dry more slowly |
| Apply coating | Same day, once dry | Work within the product’s pot life |
| Foot traffic | Often, 24 hours or label timing | Light walking only |
| Vehicle traffic | Several days or label timing | Wait for a full cure before parking |
Dry to the touch does not equal ready for tires. The use of vehicles should be based on the instructions on the coating label, particularly in hot climates or in garages where trucks and SUVs are used.
Epoxy Garage Floor Benefits
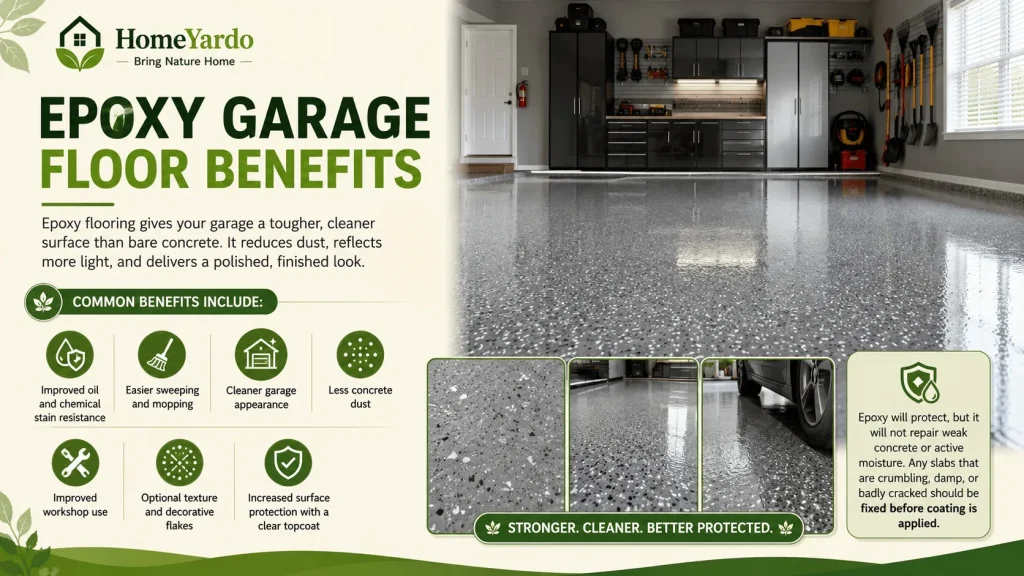
The reason for using garage epoxy is that it gives a tougher and cleaner surface than bare concrete. It can help to minimize concrete dust, enhance light reflection, and give the garage a more complete look.
Common benefits include:
- Improved oil and chemical stain resistance.
- Easier sweeping and mopping
- Cleaner garage appearance
- Less concrete dust
- Improved workshop use
- Optional texture and visual flakes.
- Increased surface protection when sealed with a transparent topcoat
Epoxy will protect, but it will not repair weak concrete or active moisture. Any slabs that are crumbling, damp or badly cracked should be fixed before coating is applied.
Pros And Cons Of Epoxy Garage Floor

Epoxy can be a strong upgrade for a garage, but it is not the right finish for every slab. The best results come from clean concrete, moisture control, proper surface prep, and enough curing time before vehicle use.
The main pros are stain resistance, easier cleaning, improved appearance, reduced concrete dust, and better protection against many garage spills. Epoxy can also make the space feel brighter, especially when flakes or a lighter finish is used.
The cons are mostly linked to prep and installation. Epoxy can peel over oil, moisture, old paint, or sealed concrete. It can also become slippery when wet if no texture or anti-slip additive is used. Some coatings may yellow near sunlight, and thin DIY systems may wear faster in heavy-use garages.
Is Epoxy Good For A Garage Floor?
Epoxy is best applied to solid, dry, clean and prepared concrete surfaces indoors. This is not suitable for all garages, particularly where there is moisture seepage in the slab or an existing coating is already deteriorating.
Before purchasing materials, do a quick suitability check to avoid wasting time and money.
| Good Fit | Poor Fit |
|---|---|
| Clean, dry indoor concrete | Damp concrete slab |
| Light cracks only | Crumbling or badly damaged concrete |
| Parking or workshop use | Outdoor UV-heavy surface |
| Proper prep is possible | The old peeling coating is not removed |
| Moderate to heavy garage traffic | Active moisture or drainage issue |
| Concrete absorbs water after prep | Sealed or contaminated concrete without proper grinding |
Don’t epoxy if there is any active water seepage, poor drainage, cracks in the structure, soft concrete, or an old, loose epoxy coating in the garage. The surface beneath the coating must be stable for the coating to do a good job.
Epoxy Paint Vs 2 Part Epoxy Vs 100 Percent Solids Epoxy
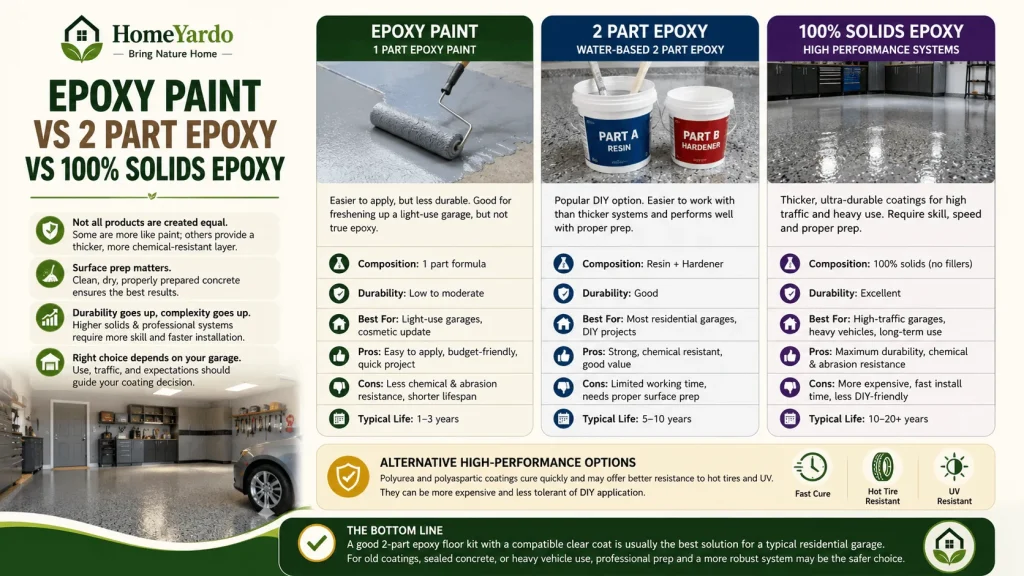
Not all the products available to sell for garage floors are created equal. Some coatings are more like paint; others provide a thicker layer of chemical resistance.
True 2-part epoxy is a combination of resin and hardener. After mixing it starts to cure and has a limited working time.
Typically, 1 part epoxy paint is easier to apply, but less durable. It can be used to freshen up a light garage, but it’s not a real epoxy.
The 2 part water based epoxy is a popular DIY option. It is easier to work with than thicker professional systems and will perform well when applied to clean, dry concrete if it is properly prepared.
Solvent-based epoxy can provide better performance, but typically has a more pronounced odor and ventilation requirements.
High solids and 100% solids epoxy coatings are thicker. They can work for high traffic garages, but need to be better prepared, faster installed and more knowledgeable.
Polyurea and polyaspartic coatings cure quickly and could have better resistance to hot tires and UV. Can be more expensive and may be less tolerant of self application.
A good 2-part epoxy floor kit that can be topped with a compatible clear coat is usually the best solution for a typical residential garage. Old coatings, sealed concrete, or long term durability may be safer for heavy vehicle use, for professional prep and a more robust coating system.
For a faster-return coating option, compare epoxy with polyaspartic garage floor coating before choosing the best system for your garage.
Water Based vs Solvent Based Epoxy vs 100 Percent Solids Epoxy

Generally, water-based epoxy is easier for do-it-yourselfers to use, as it is less fragrant and easier to work with. It is often included in home garage kits, but tends to result in a slimmer build than higher solids systems.
Solvent-based epoxy will offer a more secure hold and a harder finish, but requires additional safety precautions and ventilation. Not as easy to use for beginners as some water-based systems.
100% solids epoxy will give a thicker coat as it has little or no water/solvent to evaporate. It may be long-lasting but it is more difficult to apply smoothly, and its working time is shorter.
The type of epoxy is dependent on the condition of the concrete, the use of the garage, the price, the amount of time you have to work with it and how well you have prepared the surface. The best coating will not hold up if it is placed on top of oil, moisture, dust or sealed concrete.
Garage Epoxy Floor Color Options
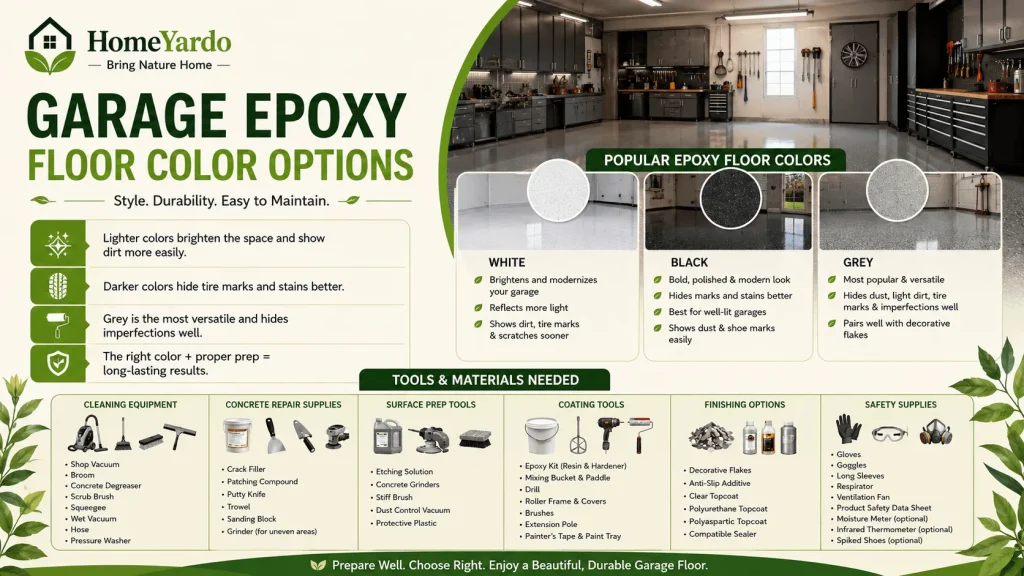
Epoxy floor colors have an impact on the appearance and upkeep of the garage. Lighter colors will make the room look cleaner and brighter, whereas darker colors will mask tire marks and stains better.
A white epoxy garage floor can help brighten up and modernize a garage. It reflects more light, which can come in handy in workshops or garages that have poor lighting. The drawback is that white floors will display tire marks, dirt, dust and scratches sooner.
A black epoxy garage floor is also a bold, polished floor that can cover up some of the marks better than a white one. It is ideal for garages that have good lighting and a contemporary design approach. Black can also be prone to dust and shoe marks, making regular cleaning necessary.
Grey epoxy garage floor is the most common color. Light or dark shades don’t hide dust, light dirt, tire marks or small imperfections as well as grey. It also lends itself to flakes as it does not overpower them.
Tools And Materials Needed
Collect all the items before mixing epoxy. Resin and hardener are mixed, and the working time begins; there is no time to check for missing supplies.
Cleaning equipment that can be used includes a shop vacuum, a broom, a concrete degreaser, a scrub brush, a squeegee, a wet vacuum, a hose, and a pressure washer.
Crack filler, patching compound, putty knife, trowel, sanding block, and a grinder for uneven or damaged areas are all concrete repair supplies that may be required.
Surface prep tools can include etching solution, concrete grinders, a stiff brush, a dust control vacuum and protective plastic.
The coating tools consist of the epoxy kit, mixing bucket, mixing paddle, drill, roller frame, roller covers, brushes, extension pole, painter’s tape, and paint tray.
Decorative flakes, anti-slip additive, clear topcoat, polyurethane topcoat, polyaspartic topcoat, or compatible sealer can all be used to finish.
Gloves, goggles, long sleeves, a respirator, a ventilation fan and the product safety data sheet should all be part of the safety supplies. In some projects, a moisture meter, infrared thermometer and spiked shoes can also be helpful.
Before You Start: Check The Concrete
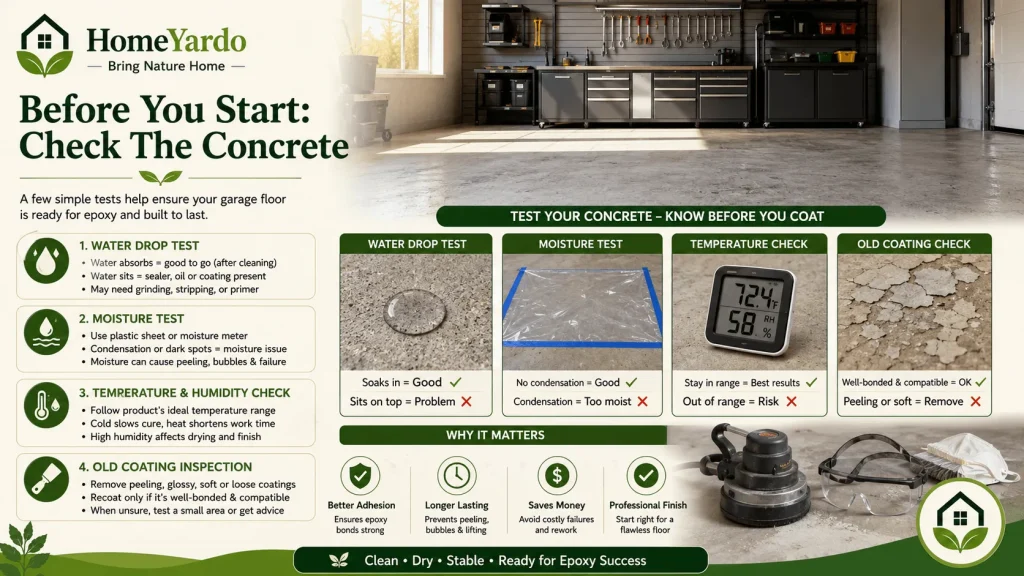
The first step in preparing a garage floor for epoxy is to determine if the concrete is clean, dry, absorbent, and stable enough to support an epoxy floor.
Testing of concrete should be conducted prior to the purchase or opening of the coating. These tests determine if the floor should be cleaned normally, if it should be given a heavier grinding, if it should be primed or if it should be taken to a professional.
A garage slab may appear clean, but contain sealer, trapped moisture, oil, dust or weak surface material which will not allow epoxy to bond.
Water Drop Test
Dampen some portions of the garage floor with water. Test just one area as a garage may have varying conditions around tires, walls, doors, and old stain areas.
If the water absorbs into the concrete, the concrete may be open enough after cleaning and surface prep to be coated.
If the water sits on the surface, there is a possibility of sealer, curing compound, oil, wax or another coating on the slab. If it is not designed for it, epoxy should not be applied over a surface that prevents it from being absorbed.
For a sealed or shiny slab, it is typically necessary to grind, strip or apply a compatible primer before it will bond properly with the epoxy.
Moisture Test
Water is among the primary reasons for epoxy failure. Place a clear plastic sheet tightly over the concrete and keep it in place per the coating manufacturer’s instructions.
If there is condensation underneath the plastic or the concrete is darkening, moisture may be seeping through the slab. A moisture meter provides a better indication than a plastic sheet alone.
Moisture can be active, leading to peeling, bubbles, cloudy finish and poor adhesion. You might need to use a vapor barrier primer on some floors. When moisture is recurring, epoxy should be postponed or evaluated by a professional.
Temperature And Humidity Check
All epoxy products have an optimum temperature range. Curing may be retarded in cold weather and result in soft or tacky areas. Excessive heat may reduce pot life and increase the difficulty in rolling a smooth coating.
High humidity can also be a problem in drying and appearance. Before selecting the day for the application, read the product label.
The temperature of the garage floor is also important. Concrete can be hotter or cooler than the air, particularly close to the garage door or outside walls.
Old Paint, Sealer, Or Previous Coating
Any old coatings should be thoroughly inspected. Before applying epoxy, any peeling, glossy, soft or poorly bonded coating should be removed.
If the old coating is strongly bonded, it can only be recoated if it is cleaned, sanded, and suitable for the new coating. Even if the epoxy is able to adhere to the paint initially, old paint can fail under the new epoxy.
If the original coating type is not known, test patches or professional advice is safer. Epoxy is no substitute for rotting paint.
Epoxy Garage Floor Installation: Step by Step

There is an ideal sequence for the installation of the epoxy floor. Clean, repair, profile, dry, coat, seal and cure the floor without omitting any of the prep steps.
Installation can be rushed and look great initially, but peel, bubble, tacky spot or hot tire marks can occur later.
Steps To Epoxy Garage Floor:
Below are the steps to follow:
Step 1: Empty, Sweep, and Inspect the Garage
Clear vehicles, storage boxes, tools, shelves and loose items from the garage. A clean floor allows for easier inspection of the slab and application of the coating without interruptions. If the garage door feels heavy, uneven, or unsafe while preparing the space, inspect it before the project and review garage door spring replacement before working around the opening.
Vacuum dust from corners, control joints, cracks and edges after sweeping the entire surface. Remove any loose paint, adhesive, drywall mud or stuck debris.
Check for oil stains, cracks, pits, damp patches, old coating, shiny sealer and weak concrete. Identify problem areas and clean/repair before proceeding.
If there is a plan to document the project visually or perform a before-and-after comparison, taking pictures before the project is undertaken can also be helpful.
Step 2: Degrease Oil Stains and Rinse Fully
Epoxy will not bond to oil and grease. Use a concrete degreaser on soiled spots, scrub with a stiff brush and allow the cleaner to work as directed on the product label.
If they are particularly heavy, they may require multiple cleanings. Scrub the floor and rinse it off thoroughly after the scrubbing process to remove all the cleaner residue.
Continue rinsing if the rinse water is still slippery. Residue from cleaning can also reduce adhesion as can oil. Remove standing water with a wet vacuum or squeegee to ensure even drying.
Step 3: Repair Cracks, Pits, and Spalled Concrete
Cracks, pits and damaged concrete should be repaired prior to coating. While epoxy can enhance the surface appearance, it cannot repair weak or crumbling concrete.
Fill small cracks, chips and divots with a compatible crack filler or concrete patch. Remove loose material before filling. Do not etch, grind or coat until repairs are fully cured.
Unless the product system is specifically designed to fill the control joints, they remain open. If cracks, sunken areas or extensive spalling are detected, it may be necessary to have it professionally repaired before epoxy is applied.
Step 4: Etch or Grind the Concrete
The surface profile is necessary for epoxy to adhere to the concrete. If smooth or sealed concrete is present, it can peel off due to the presence of the coating on the surface rather than being integral.
The objective is to have a lightly rough surface, not polished concrete. This is sometimes referred to by professional installers as a concrete surface profile, providing the coating with something to hold on to.
The two common methods of surface preparation are etching and grinding.
When Acid Etching Works
When the concrete is bare, clean and not sealed, many DIY epoxy kits will work with acid etching. The process roughens the surface to allow the epoxy to adhere.
Typically the floor must be wetted, treated with the etching solution, scrubbed, rinsed thoroughly, and dried thoroughly. Use according to the product label instructions for safety, dilution, neutralization and disposal.
Sealed, painted or heavily contaminated concrete is less suitable for etching. May not strip old coatings, oil residue or heavy surface sealers.
When Grinding Is Better
Grinding works well for sealed concrete, smooth slabs, old coatings and garages requiring stronger adhesion. It can also be used to remove weak surface material and form a reliable profile.
Grinding generates dust and should be done with the appropriate safety equipment such as a dust control vacuum and a dust mask. It is frequently employed in professional systems as it provides greater control of surface preparation.
When the coating is old or the floor is already sealed or a higher durability coating, grinding is generally the more effective option.
Adhesion Test After Prep
Before coating the entire garage, if the floor condition is not known, a small adhesion test can be performed. Test a small area in a problem area, allow to cure as directed on the product label, and test for a firm bond.
If the patch can be easily lifted, flakes off or comes off with the tape, the concrete probably requires additional preparation. The problem could be due to sealer, moisture, oil, dust, or weak surface concrete.
A test patch does not constitute a full laboratory test; however it can save the coating of an entire floor that is not ready.
Step 5: Apply Primer If Needed
Not all garage floors need to be covered with primer, but in some instances, it may be beneficial to do so. Coating systems are sometimes used to get a better bond, to seal porous concrete, or to provide a bond for a topcoat system.
Primer may be necessary for porous concrete, old epoxy to be recoated, difficult slabs, or moisture vapor issues.
If moisture vapor is acceptable in the product, a vapor barrier primer may be recommended. It is not a solution to severe water intrusion or water leaks.
Always use a primer that is compatible with the epoxy system.
Step 6: Let The Concrete Dry Completely
The floor of the garage should be completely dried after it has been rinsed, etched or washed. A slab may appear dry on the surface and have water in the pores.
Weather, air flow, humidity and slab condition will affect drying time. Generally, cool or humid garages require more time.
Fans can assist with air movement, but should not be used as a substitute for moisture testing. If necessary, repeat the moisture check prior to coating. If you apply the epoxy too early, it will trap water inside and cause bubbles, peeling or cloudy spots.
Step 7: Mask Edges And Plan Your Work Route
Tape around garage door edges, steps, drains, transitions, baseboards and walls. Cover all surfaces that are not to be coated with epoxy.
Before mixing, determine the coating path. Begin at the farthest corner and head towards the exit. Have tools, flakes, topcoat supplies and roller covers available.
The appearance and curing of coatings can be impacted by direct sunlight near the garage door. A clear work route prevents stepping in wet epoxy and leaving uneven roller marks.
This is also a good time to check garage door weather stripping, because poor sealing near the door can let water, dust, and outside air reach the fresh coating area.
Step 8: Mix The Epoxy Correctly
Epoxy typically consists of resin and hardener. These components need to be combined in the correct proportion according to the manufacturer’s instructions.
Clean the bucket and mixing paddle. Scrape the sides and bottom as you mix to ensure that no unmixed material is left. There is a waiting period between the time of purchase and when the product can be used.
Pot life starts after the parts have been mixed. Never mix more than can be applied in the working time. Avoid scraping the excess epoxy from a hot bucket to the floor if it has begun to set.
Sticky or soft areas can result from incorrect ratios, inadequate mixing, out-of-date product or overworked material.
Step 9: Apply The First Coat
Start by cutting around the edges with a brush and then roll the main floor in small sections. Maintain a wet edge and apply the coating in a uniform manner.
Do not work in puddles, thin dry areas or puddle the epoxy. Avoid applying the coating too thinly to cover more area. Thin coverage may decrease durability and increase wear rate.
The right nap on a roller aids in controlling thickness. Some systems may find spiked shoes useful, but only if they are suitable for the product.
Step 10: Add Flakes Or Anti Slip Additive
Decorative flakes are added when the epoxy is still wet. Light broadcast results in a speckled appearance, and a heavy broadcast results in a flaky surface.
Small imperfections can be camouflaged and texture can be added by using flakes. Texture can be enhanced with a full flake broadcast, but the overall slip resistance will be determined by flake coverage, topcoat type, and anti-slip additive.
The flakes can make an floor appear more complete than a simple solid color finish. Flakes also cover small dust marks, roller lines, minor surface flaws and light wear. A light flake broadcast will provide a cleaner speckled finish; a full flake broadcast will provide a heavier textured finish.
Slip resistance is not guaranteed by flakes. The final grip is determined by the amount of flake coverage, the thickness of the topcoat, and the use of an anti-slip additive in the final coat.
Toss up and spread out the flakes evenly over the wet coating. Directing them at the ground can form spills or patches.
Step 11: Apply Clear Topcoat Or Sealer
A clear topcoat helps protect the epoxy and flakes from wear. It can improve scratch resistance, chemical resistance, gloss, cleanability, and hot tire protection.
Sealing garage floor epoxy helps protect the base coat from scratches, tire marks, chemical spills, and daily wear. It is especially useful when flakes have been added because the clear coat locks the flakes in place and creates a smoother, easier-to-clean finish.
The clear sealer or topcoat should always be compatible with the epoxy system. If a coating is not compatible, it can cause peeling, cloudiness, poor adhesion or uneven gloss.
Common topcoat materials are clear epoxy, polyurethane and polyaspartic coatings. The topcoat has to be compatible with the base epoxy.
The topcoat should be selected to match the vehicle use, amount of UV exposure, traction required and the manufacturer’s system. While a topcoat might seem like a luxury on a budget project, it’s strongly advised if you’re looking for a garage that will last long term.
Garage Floor Epoxy Thickness Guide
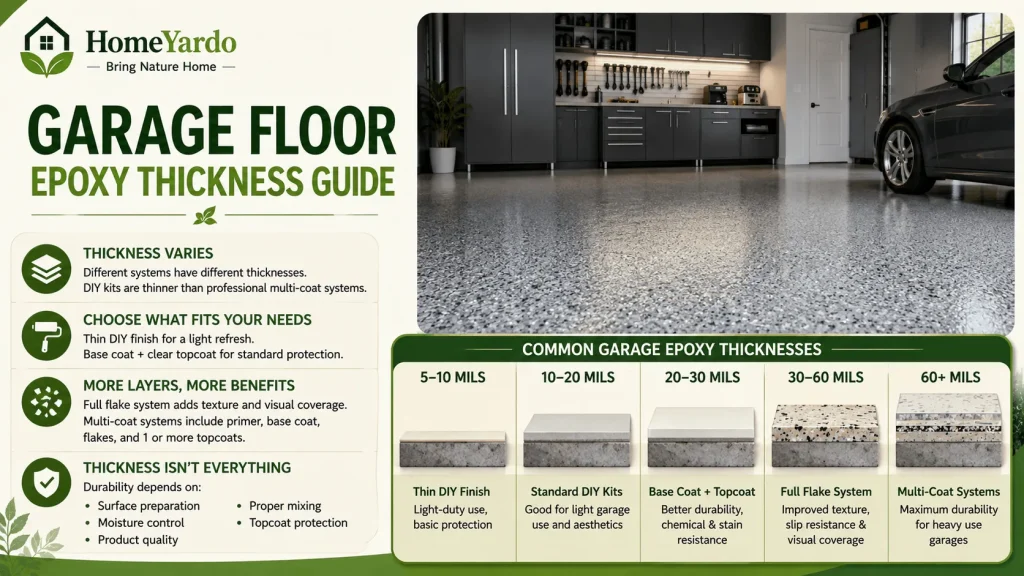
There are different thicknesses of garage epoxy, depending on the product and system. Typical do-it-yourself kits are less thick than professional multi-coat systems.
For a light garage refresh, a thin do-it-yourself finish might suffice. For standard garage applications, an epoxy base coat with a clear topcoat will provide more protection. The use of a full flake system can enhance texture and visual coverage. A multi-coat system can consist of a primer, base coat, flakes and a single or multiple protective topcoats.
There is no relationship between thickness and durability. All of these things are important: surface preparation, moisture control, product quality, proper mixing and topcoat protection.
Drying And Curing Time
Drying does not equal curing. A floor can be dry before it’s ready for heavy use or vehicles.
Please refer to the product label as cure time varies by temperature, humidity, film thickness and coating.
Dry to the touch: The surface may not transfer the coating when lightly touched. The foot traffic typically follows. Traffic should not be allowed to pass until the coating is fully cured or until the manufacturer has specified otherwise.
If you drive on epoxy before it is ready, you may leave tire marks, dull spots, soften the coating or damage the epoxy.
Epoxy Garage Floor Cost

Epoxy floor cost is determined by the size of the garage, the type of coating, the condition of the slabs, and the preparation work required. A clean, bare slab will typically be less expensive than a stained, cracked, sealed or previously coated floor.
The coating kit is just one component of the overall cost. Final price can vary for cleaning supplies, crack repair, grinding, primer, flakes, topcoat, old coating removal and labor.
The lower-priced garage is typically a clean one that is a DIY kit. A 2-car garage with flakes and topcoat is more expensive. Old painted floor that requires grinding – more expensive. A full professional broadcast system is typically the most expensive, but can last longer if the system is installed properly.
If you’re using it for light use, a lower-cost kit might be acceptable, but if you’re using it a lot, you may want to invest in a better system and prep.
Epoxy Garage Floor Kits vs Professional Installation

Epoxy floor kits can be effective if the concrete is clean, dry, unsealed and in good condition. They tend to be less expensive than professional services, but are less forgiving of errors.
Sealed slab, old coatings, damaged concrete, moisture problems, heavy vehicle traffic and garages require a thicker multi-coat system, which is generally installed by a professional.
Usually, simpler systems and prep are used in DIY kits. Mechanical grinding and more powerful coating systems and application methods are commonly used by professional installers.
If you’re looking to make a simple DIY garage, a quality epoxy kit may be sufficient. If a floor is to be used heavily, if there are prep issues, or if the floor is going to be used for a long time, grinding is typically a safer option and is usually accompanied by a more robust coating system. It is possible to get a satisfactory result with DIY garage floor epoxy if the slab is clean, dry, unsealed and lightly damaged, but it depends greatly on the cleaning, moisture testing and surface prep.
Garage Floor Coating Types Explained

There are many different types of garage floor coatings such as epoxy, polyurea, polyaspartic, polyurethane topcoats, concrete sealers, garage floor tiles, and polished concrete. All options have different performance characteristics depending on specific conditions, vehicle usage, cure time, moisture exposure and budget.
Epoxy vs Concrete Garage Floor
A bare concrete garage floor is easy to maintain, long-lasting, and inexpensive, but can soak up oil, become dusty, and eventually stain over time. The epoxy will provide a protective layer over the concrete, which may enhance stain resistance, cleanability, brightness and appearance.
Where appearance is not important and the lowest maintenance surface is desired, concrete may be more suitable for garages. Epoxy works best if the garage is looking for a cleaner, more finished and more stain-resistant surface.
Best Garage Floor Coating Options Comparison
Epoxy is a great option for a coated and decorated garage floor that is stain resistant. Polyurea and polyaspartic coatings cure more quickly and can possibly deal with hot tires better, but tend to be costlier. Concrete sealer is more inexpensive and less protective; garage tiles are quick to install, but they have seams and polished concrete provides a natural look, but typically requires special equipment.
Epoxy Garage Floor Vs Polyurea

Epoxy is usually more affordable and works well for many indoor garage floors when the concrete is prepared correctly. It gives a durable coated surface, accepts flakes, and can be sealed with a clear topcoat for better wear resistance.
Polyurea cures faster and may offer better resistance to UV exposure, hot tire pickup, and quick return to service. It usually costs more and is often less forgiving for DIY application because the working time can be short.
For budget-friendly garage upgrades, epoxy is often the practical choice. For fast installation, heavy use, or stronger hot tire resistance, polyurea or polyaspartic systems may be worth considering.
Epoxy Vs Polished Concrete Garage Floor
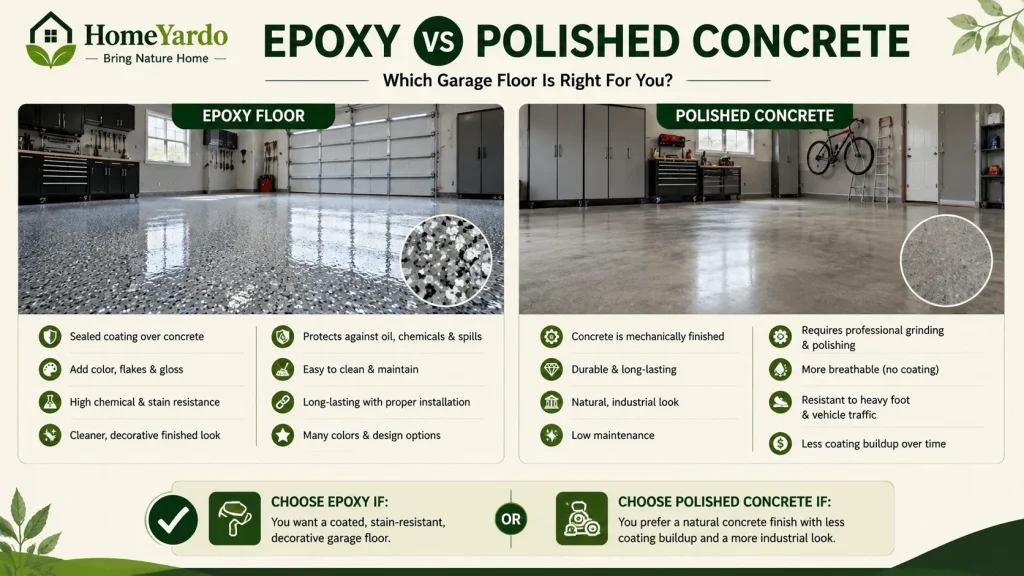
Epoxy creates a sealed coating over the concrete. It can add color, flakes, gloss, chemical resistance, and a cleaner finished look. It is a strong choice when the goal is stain protection and a decorative garage surface.
Polished concrete keeps the concrete itself exposed and mechanically finished. It can be durable and low maintenance, but it usually requires professional grinding and polishing equipment.
Choose epoxy if the garage needs a coated, stain-resistant, decorative floor. Choose polished concrete if the goal is a natural concrete finish with less coating buildup and a more industrial look.
Best Coating For Hot Tires And Heavy Vehicles
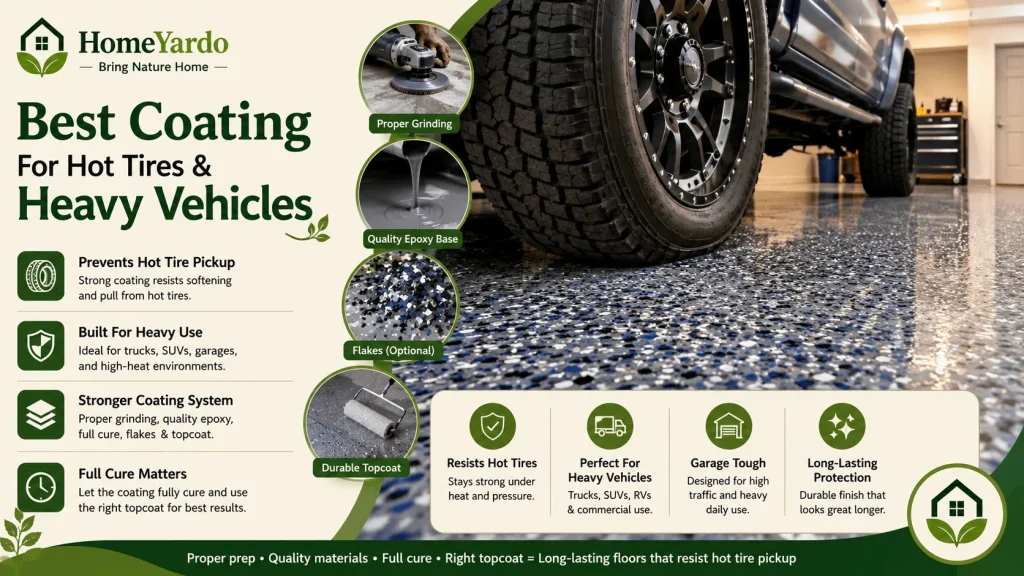
Hot tire pickup happens when warm tires soften or pull at a weak coating. It is more likely with thin coatings, poor prep, early vehicle use, or low-quality products.
For heavy vehicles, trucks, SUVs, or garages exposed to high heat, a stronger system is safer. Good options often include proper grinding, a quality epoxy base, full cure time, flakes if desired, and a durable topcoat.
Full cure time and topcoat choice work together. Even a strong epoxy can mark if hot tires are parked on it too early or if the system is too thin for the way the garage is used.
Common Mistakes That Cause Epoxy Floors To Fail

Most epoxy floor problems come from rushed prep or poor application conditions. The coating may look good at first, then peel, bubble, or mark after use.
| Mistake | What Happens | How to Avoid It |
|---|---|---|
| Poor cleaning | Peeling or fish eyes | Degrease fully |
| Damp concrete | Bubbles or cloudy coating | Moisture test |
| No surface profile | Poor adhesion | Etch or grind |
| Wrong mix ratio | Sticky spots | Follow the label ratio |
| Working too slowly | Roller marks | Respect the pot life |
| No topcoat | Faster wear | Seal the surface |
| Early vehicle use | Tire marks | Wait for a full cure |
Real examples make these mistakes easier to understand. If the floor looked dry but failed a moisture test, bubbles or peeling may appear later. If old paint was lightly sanded but not removed, the new epoxy can lift with the old coating. If a vehicle returns before full cure, tire marks or softened coating can appear. If an oil stain was cleaned once but still remained, peeling may happen in the tire path.
A garage epoxy project should not be rushed just to finish in one day.
Troubleshooting After Application

Problems can still happen after the epoxy is applied. The cause should be identified before sanding, recoating, or removing the floor.
Small cosmetic issues may be repairable. Widespread peeling, moisture failure, or soft coating may require removal and a fresh start. The cause must be fixed before recoating, or the same failure can happen again.
Why Is My Epoxy Garage Floor Peeling?
Peeling usually means the coating did not bond correctly. Common causes include oil, dust, moisture, sealed concrete, weak etching, skipped grinding, or applying over old failing paint.
Peeling in one area often points to oil, dust, or old coating failure in that spot. Loose coating should be removed before repair. Recoating over peeling epoxy usually fails again.
Why Is The Floor Still Sticky?
A tacky epoxy floor may come from the wrong mix ratio, poor mixing, expired material, low temperature, or applying the coating too thickly.
Cold temperatures may delay curing, and some areas may improve with more time if the mix was correct. A wrong mix ratio usually will not fix itself and may require removal of the soft material.
Why Are There Bubbles?
Bubbles can come from moisture, air escaping from porous concrete, high heat, thick application, or coating before the slab dries fully.
Bubbles across large areas may point to moisture or air release from porous concrete. If bubbles are minor, sanding and recoating may help. If they are widespread, the underlying moisture or surface issue must be corrected first.
Why Are Tire Marks Showing?
Tire marks can happen when vehicles return too early, hot tires sit on a weak coating, the film is too thin, or there is no protective topcoat.
Hot tire pickup is more likely when vehicles return before full cure or when no protective topcoat was used. A compatible topcoat can improve resistance, but severe damage may require sanding or removing the failed layer.
Can You Recoat A Failed Epoxy Floor?
A failed epoxy floor can sometimes be recoated if the old coating is firmly bonded. The surface must be cleaned, sanded, and checked for compatibility.
If the coating is peeling, soft, bubbling, or lifting in many areas, removal is usually better than adding another layer. The original cause of failure should be fixed before recoating.
How Long Will Epoxy Garage Floor Last?
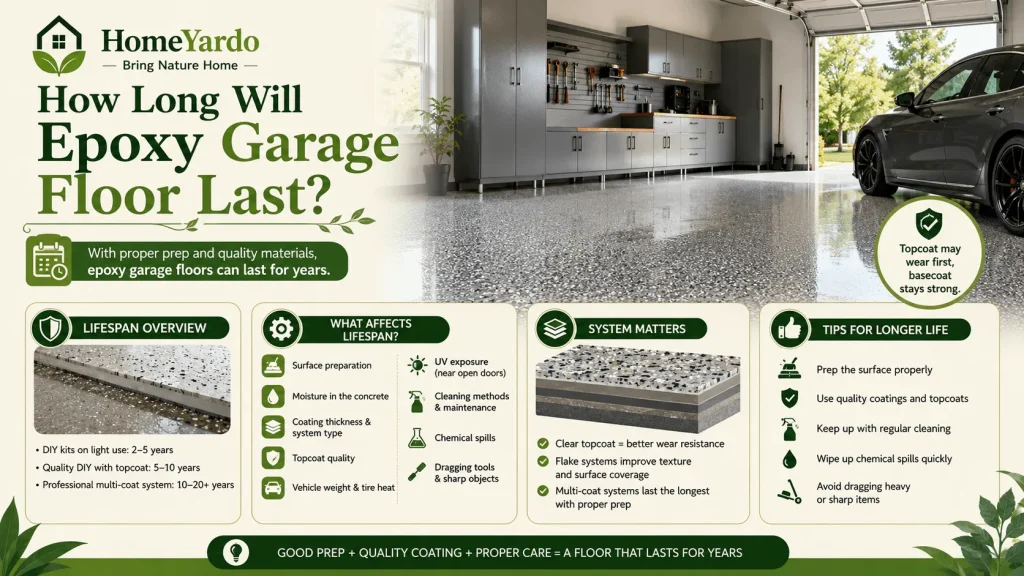
The life of an epoxy floor depends on the type of coating system and preparation, and it can last for several years or longer. A simple DIY system on a lightly used garage might not last as long as a professionally ground and topcoated system.
A simple do-it-yourself kit can last a shorter period of time if it is not prepared or if there is a lot of traffic. Generally, a DIY kit that has a clear topcoat will provide a higher level of wear resistance than a base coat alone. A complete flake system can enhance texture and surface coverage. A multi-coat system is generally more effective if the prep is properly performed.
Surface preparation, moisture content of the slab, coating thickness, quality of the topcoat, vehicle weight, tire heat, exposure to UV near open doors, cleaning procedures, chemical spills, and dragging tools and sharp objects are all important factors in the lifespan of a coating.
Often the topcoat can be worn out without the basecoat.
How to Maintain An Epoxy Floor

Regularly sweep the area for any grit and dirt to prevent them from scratching the finish. Use a mild cleaner to wipe and remove any residue if necessary.
Quickly clean oil, brake fluid, gasoline, road salt and chemicals. Do not use harsh acidic cleaners unless recommended by the coating manufacturer.
Install mats under jacks and kickstands, sharp tool stands and heavy equipment. If heavy storage racks are stored for extended periods of time, soft pads will help.
Good care maintains the gloss, traction and coating life.
Final Checklist Before Applying Epoxy
Use this checklist before opening the epoxy kit. It helps confirm that the floor, tools, timing, and safety items are ready.
- The floor is empty
- Concrete is swept and vacuumed
- Oil stains are degreased
- Cleaner residue is rinsed
- Cracks and pits are repaired
- The water drop test passed
- Moisture test passed
- Surface is etched or ground
- Old coating is removed or confirmed to be bonded
- The test patch is completed if the floor condition is uncertain
- The first decision is made
- Topcoat is selected
- The floor is fully dry
- The temperature is suitable
- Tools are staged
- PPE is ready
- The exit route is planned
- The product label has been read
- The safety data sheet is checked
If any item is not complete, fix it before mixing the coating.
Conclusion
When the concrete is appropriate and the garage floor epoxy preparation is done properly, epoxy can be a long-lasting and beautiful solution for the garage floor. Clean concrete, careful moisture testing, proper repair, good surface profiling, correct mixing and sufficient cure time are the most important factors for achieving the best results.
Prep is the key; product is the next. A clear topcoat can help to increase wear resistance, protect flakes and make the floor more suitable for everyday use in the garage. Avoid rushing the prep and/or driving on the surface prior to complete cure.
FAQ’s
An epoxy floor is a concrete floor coated with an epoxy resin system that hardens into a protective surface. It can improve stain resistance, reduce concrete dust, add gloss, and make the garage easier to clean. Most garage epoxy systems need clean, dry, and properly prepared concrete to bond well.
The best garage floor coating for heavy vehicles is usually a properly prepared multi-coat system with strong surface prep, a durable epoxy or polyurea base, and a protective clear topcoat. Heavy vehicles place more stress on the coating, especially when tires are hot. Thin DIY coatings may wear faster if the slab is not ground, cured, and sealed correctly.
To apply garage epoxy, clean and degrease the concrete, repair cracks, test for moisture, then etch or grind the surface so the coating can bond. After the floor is fully dry, mix the epoxy according to the label and roll it in small sections within the pot life. Add flakes while the coating is wet, then apply a compatible clear topcoat if the system requires it.
Yes, a garage floor can be epoxied as a DIY project if the concrete is clean, dry, and properly prepared. The most difficult part is usually not rolling the coating but removing oil, testing moisture, repairing damage, and creating a proper surface profile. A DIY kit can work well on a sound garage slab, but sealed, damp, cracked, or previously painted floors need extra caution.
The best way is to clean and degrease the concrete, repair cracks and pits, test for moisture, then etch or grind the surface before coating. Once the floor is dry, mix the epoxy exactly as the label says and apply it in small sections within the pot life. Flakes and a clear topcoat can improve texture, appearance, and long-term protection.
Concrete should be swept, vacuumed, degreased, rinsed, repaired, and checked for sealer or moisture before epoxy is applied. The surface also needs to be etched or ground so the coating can grip instead of sitting on smooth concrete. Skipping prep can lead to peeling, bubbles, tacky areas, or poor hot tire resistance.
Epoxy can only be applied over old paint if that paint is firmly bonded, clean, sanded, and compatible with the new coating system. If the old paint is peeling, glossy, soft, or lifting, it should be removed first. Otherwise, the new epoxy may bond to the old paint, but the old paint may still separate from the concrete underneath.
Cure time depends on the coating type, temperature, humidity, and product instructions. Many epoxy floors allow light foot traffic after about 24 hours, but vehicle traffic often needs several days or the full cure time listed by the manufacturer. A floor that feels dry to the touch may still be too soft for hot tires, heavy storage, or parked vehicles.
Epoxy floor cost depends on garage size, slab condition, coating type, prep work, flakes, primer, topcoat, tools, and labor. A clean garage using a DIY kit costs less than a floor that needs crack repair, grinding, old coating removal, or professional installation. The coating kit is only one part of the total project cost.
Many garage floors use one epoxy base coat and one clear topcoat. Higher-performance systems may include primer, epoxy base coat, flakes, and one or two protective topcoats. More coats can improve durability, but they only help when the concrete has been cleaned, profiled, dried, and coated correctly.
Epoxy is often more affordable and works well for many indoor garage floors when surface prep is done correctly. Polyurea and polyaspartic coatings can cure faster and may offer better resistance to UV exposure and hot tire pickup. The better choice depends on budget, garage use, cure time, and whether the floor needs DIY or professional installation.
Bubbles often come from moisture, trapped air in porous concrete, high heat, overapplication, or coating before the slab has dried fully. Large areas of bubbles may point to moisture vapor or air release from the concrete surface. Proper moisture testing, surface prep, drying time, and product application help reduce this risk.
An epoxy floor may last a few years or much longer, depending on prep quality, coating type, topcoat protection, traffic, moisture, and maintenance. A basic DIY kit may wear faster in a high-use garage, while a professionally prepared multi-coat system can usually handle more abuse. Cleaning spills quickly and avoiding heavy scraping can help extend the floor’s life.
Epoxy may improve buyer appeal because it makes the garage look cleaner, brighter, and more usable. It can also make the space feel more finished, especially when the coating is smooth, well-cured, and properly maintained. The value impact depends on the quality of the installation and how useful the garage space feels to buyers.
The best DIY epoxy floor kit should match the garage size, slab condition, traffic level, and cure time available. For a standard clean garage, a 2-part water-based epoxy kit with a compatible clear topcoat is often practical. If the floor has old paint, moisture, heavy cracks, or sealed concrete, professional prep may be better than relying on a basic kit.
Polished concrete can be durable and low maintenance, but it keeps the concrete surface exposed and usually needs professional grinding equipment. Epoxy creates a coated surface with color, flakes, gloss, stain resistance, and chemical protection. Epoxy is usually better for a decorative garage coating, while polished concrete suits a natural industrial finish.
Most epoxy floor products work best in a moderate temperature range, often around 50°F to 90°F, but the product label should always guide the final decision. Cold concrete can slow curing and leave soft or tacky spots. Hot conditions can shorten pot life, making the epoxy harder to roll evenly before it starts setting.
The strongest garage floor coating is usually a professionally prepared multi-coat system, often using 100 percent solids epoxy, polyurea, or polyaspartic coatings with a durable clear topcoat. Strength depends on more than the coating name. Concrete prep, moisture control, thickness, cure time, and topcoat quality all decide how well the floor holds up.
A basic DIY epoxy kit may last a few years in a light-use garage, especially if prep is simple and no topcoat is used. A DIY epoxy floor with a clear topcoat usually lasts longer because it has better wear protection. A professionally prepared multi-coat epoxy, polyurea, or polyaspartic system can last much longer when the slab is dry, ground properly, and maintained well.
The best garage floor coating for hot tires is usually a properly prepared epoxy, polyurea, or polyaspartic system with a strong, clear topcoat. Hot tire pickup is more likely when the coating is thin, poorly bonded, or used before full cure. For heavy vehicles or hot garages, professional grinding, full cure time, and a durable topcoat matter more than the coating label alone.
References
- Home Depot: How to Epoxy a Garage Floor
- Lowe’s: How to Epoxy Garage Floor
- Bunnings: How to Epoxy a Garage Floor
- Benjamin Moore: Painting Garage Floors With Epoxy
- Garage Flooring LLC: Epoxy Coating Guide
- Epoxy Flooring Tech: Garage Epoxy Guide
- Philip or Flop: Epoxy Garage Floor
- Sawmill Creek Forum: Epoxy Your Garage Floor Discussion
- JetBoaters Forum: Garage Floor Epoxy Discussion
- Quora: Benefits and Drawbacks of Epoxy Coating