What Homeowners Should Know Before Installing Luxury Vinyl Plank Flooring

Luxury vinyl plank flooring has become a common choice for homeowners who want the appearance of wood flooring without some of the maintenance requirements associated with natural hardwood. LVP is available in a wide range of colors, plank sizes, textures, and construction types, making it suitable for many areas of a home.
However, choosing an attractive plank is only one part of a successful flooring project. Subfloor conditions, transitions, expansion space, layout, moisture, stairs, and installation methods can all affect how the finished floor looks and performs.
Before starting an LVP project, homeowners should understand a few practical details that can prevent expensive problems later.
Start With the Subfloor
One of the most important parts of an LVP installation is actually underneath the finished flooring.
Luxury vinyl plank is relatively thin compared with many traditional flooring materials. Because of this, imperfections in the subfloor can affect the finished installation.
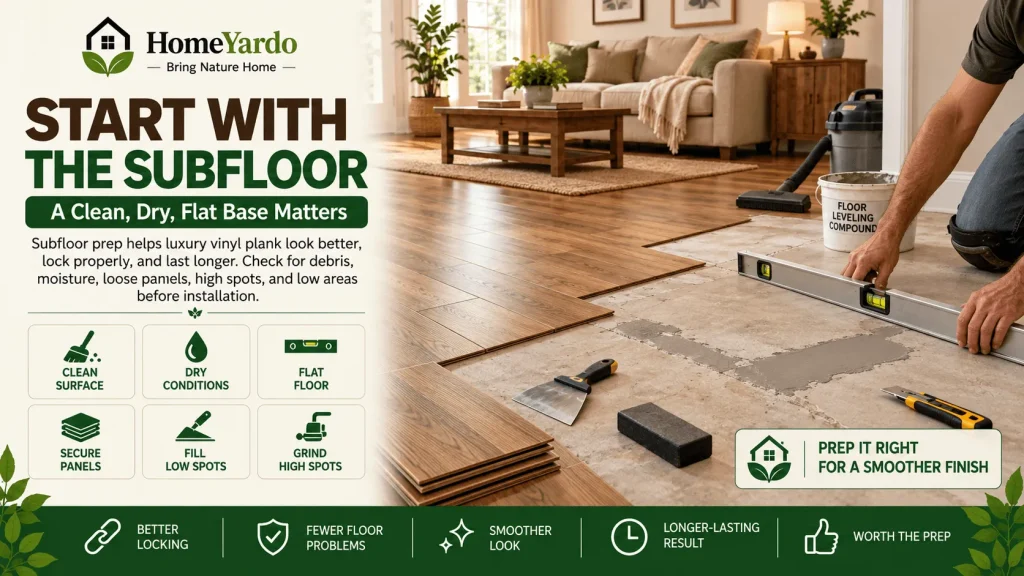
The floor should generally be clean, dry, structurally sound, and sufficiently flat for the flooring manufacturer’s specifications.
A subfloor does not necessarily need to be perfectly level. Flatness is usually the more important consideration. High and low areas can cause movement in a floating floor and may eventually contribute to problems with joints or locking mechanisms.
Depending on the existing conditions, preparation may involve removing debris, securing loose subfloor panels, grinding high spots, filling low areas, or applying a self-leveling product.
Skipping preparation to save time can create problems that are much more difficult to correct after the flooring has been installed. For another flooring installation project, proper preparation and surface condition are also important when installing epoxy flooring.
Understand the Different Types of LVP
Not every luxury vinyl plank product is constructed the same way.
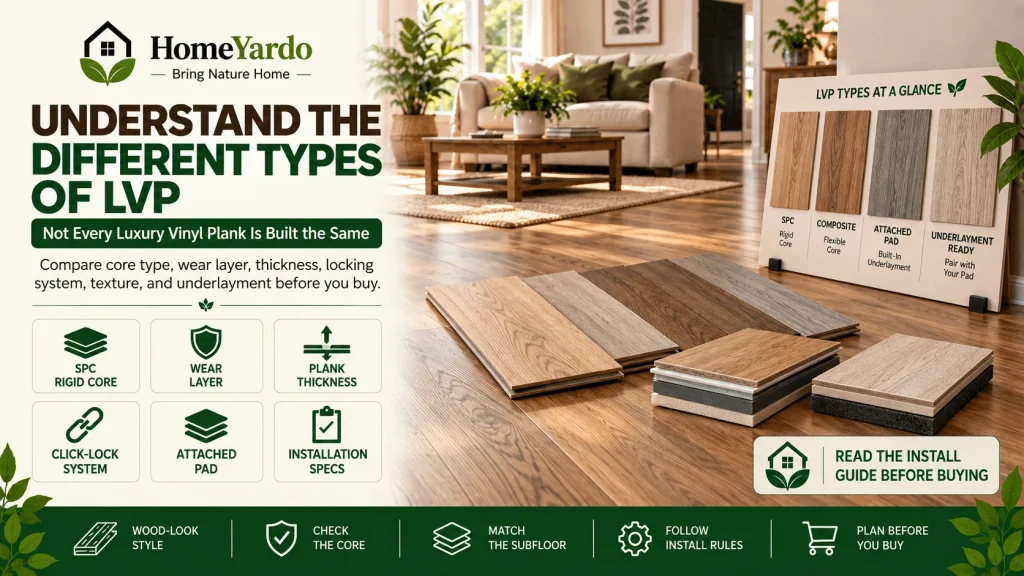
Many current products use rigid cores such as SPC, while others use different vinyl or composite constructions. Homeowners comparing flooring materials should also understand how different flooring systems are designed for specific applications. Some have attached padding, while others require or permit a separate underlayment.
There are also differences in wear layers, overall plank thickness, locking systems, surface texture, and installation requirements.
Homeowners should read the manufacturer’s installation instructions before purchasing the flooring rather than assuming that every LVP product installs in the same manner.
This becomes especially important when installing flooring over concrete, radiant heating systems, existing flooring, or other unusual substrates.
Plan the Layout Before Installing the First Row
Flooring layout can have a significant effect on the appearance of a room.
Installers normally consider the dimensions of the space before determining where the first plank should begin. Without planning, the installation can finish with extremely narrow pieces along a visible wall.
Doorways, hallways, kitchen islands, cabinets, fireplaces, and adjoining rooms can also influence the layout.
In open floor plans, plank direction becomes particularly noticeable because the flooring may continue through several connected areas.
A few measurements before installation can prevent awkward cuts and help create a more balanced finished appearance.
Don’t Ignore Expansion Requirements
Many LVP floors are installed as floating systems. Instead of being fastened directly to the subfloor, the planks connect to one another and remain capable of limited movement.
Manufacturers typically require expansion space around walls and fixed objects.
Baseboards or shoe molding normally cover this space after installation.
Installing flooring too tightly against walls, cabinets, door jambs, or other fixed surfaces can restrict movement. Under certain conditions, this may contribute to buckling, separation, or other flooring problems.
The exact expansion requirement depends on the flooring manufacturer, which is another reason the installation instructions should be reviewed carefully.
Think About Transitions Before Buying the Flooring
Transitions are easy to overlook when selecting flooring.
They become necessary where LVP meets another flooring material, changes height, reaches certain doorways, or terminates at specific locations.
Common transition components include reducers, T-moldings, end caps, thresholds, and stair-nose pieces.
Ideally, homeowners should determine which accessories are available before purchasing the flooring.
Some flooring collections have matching transitions and stair components. Others have only limited accessories, requiring homeowners to use coordinating rather than exact-match pieces.
This can be particularly noticeable around stairs.
If matching trim is important to the project, verify availability before committing to a specific flooring collection.
Stairs Require Additional Planning
Installing LVP on a flat floor and installing it on stairs are very different tasks.
Stairs require individual measurements and additional cutting, fitting, and finishing. Stair-nose availability can also determine whether a particular flooring product is practical for the project.
Homeowners planning to continue the same flooring onto a staircase should investigate the manufacturer’s stair components at the same time they select the flooring.
Waiting until the main floor is already installed can leave limited options if matching stair noses are unavailable.
The condition and construction of the existing stairs also matter. Carpet removal, staples, adhesives, old nosing, uneven treads, or damaged material may require additional preparation.
Door Jambs and Trim Affect the Finished Appearance
Small finishing details often distinguish a clean installation from one that looks improvised.
Door jambs are a good example.
Instead of simply cutting flooring around the shape of the casing and leaving visible gaps, installers can often undercut appropriate jambs and casings so the flooring fits underneath them.
The result generally looks cleaner and more integrated.
Baseboards present another decision. Depending on the project, existing baseboards may remain in place with shoe molding added afterward, or they may be removed and reinstalled or replaced.
The right approach depends on the existing trim and the appearance the homeowner wants.
Moisture Still Matters
The word “waterproof” appears frequently in LVP marketing, but homeowners should understand what it means.
A waterproof plank does not automatically make the entire room or building assembly waterproof.
Water can still travel around the perimeter of the floor, beneath cabinets, through walls, or into the subfloor.
Concrete installations can present additional moisture considerations. Manufacturers may specify testing procedures, vapor barriers, or other requirements depending on the product and substrate.
The flooring manufacturer’s instructions should determine the appropriate installation method.
Consider Whether DIY Installation Makes Sense
One attraction of click-lock LVP is that experienced DIY homeowners can install many products themselves.
Simple rectangular rooms with good subfloors are considerably easier than complicated layouts involving multiple rooms, stairs, numerous doorways, uneven substrates, or transitions to several flooring types.
The flooring itself is only part of the project.
Removing existing flooring, preparing the substrate, planning the layout, cutting around obstacles, installing transitions, and finishing stairs can account for a substantial amount of the work.
For complicated projects, professional LVP flooring installation can help address substrate preparation, layout, transitions, stairs, and finishing details as part of the overall installation process.
Calculate More Than the Exact Square Footage
Homeowners should generally avoid ordering exactly the measured square footage of a room.
Installation creates waste from end cuts, damaged pieces, layout adjustments, and unusable portions of planks.
The amount of additional material needed depends on the layout and product. Complicated spaces may produce more waste than simple rectangular rooms.
It can also be useful to keep some unused flooring after the project is completed.
If a plank becomes badly damaged years later, having material from the original production run can make a repair easier, especially if the manufacturer has discontinued the color.
Inspect the Flooring During Installation
Planks should be inspected as they are removed from their boxes.
If a piece has obvious manufacturing damage, unusual coloration, damaged locking edges, or another visible defect, it is usually better to identify it before installation.
Homeowners may also want to mix planks from several boxes during installation.
This can help distribute minor shade or pattern variations throughout the room instead of concentrating them in one area.
Don’t Choose Flooring Based on Appearance Alone
Color and texture are important, but practical considerations deserve equal attention.
Before purchasing LVP, consider where it will be installed, the condition of the subfloor, the amount of traffic the room receives, whether stairs are involved, and what transition pieces will be necessary.
Also investigate warranty requirements and installation specifications.
A flooring product that works well in one house may not necessarily be the most practical choice for another.
Final Thoughts
Luxury vinyl plank can provide an attractive and practical flooring surface, but successful results depend on more than choosing the right color.
Subfloor preparation, careful layout, expansion space, transitions, stairs, moisture considerations, and finishing details should all be addressed before installation begins.
Taking time to plan these details can prevent many of the problems that homeowners encounter during flooring projects.
Most importantly, consider the entire installation before purchasing the material. Verify the flooring specifications, check whether the necessary transitions and stair components are available, inspect the existing subfloor, and determine how the new flooring will connect with the rest of the home.
A little preparation before installation can make a substantial difference in both the appearance and long-term performance of the finished floor.
FAQ’s
Check the subfloor, moisture conditions, LVP construction, installation method, expansion requirements, underlayment rules, transitions, stairs, layout, and manufacturer instructions before starting. Planning these items before buying the flooring can prevent expensive changes during installation.
Not necessarily. Flatness is often more important than whether the entire floor is perfectly level. Sudden high or low spots can affect how planks sit and how locking joints perform. Always follow the flatness tolerance stated by the flooring manufacturer.
Some LVP products can be installed over certain existing floors if the surface is stable, clean, flat, dry, and approved by the manufacturer. Loose flooring, thick carpet, damaged surfaces, moisture problems, or unsuitable substrates may need to be removed or corrected first.
It depends on the product. Some LVP has attached padding, while other products require or permit separate underlayment. Do not add extra underlayment unless it is approved for the flooring system being installed.
Many LVP products use waterproof materials, but that does not make the entire room or subfloor waterproof. Water can still travel around edges, through penetrations, beneath cabinets, or into the structure. Plumbing leaks and substrate moisture still need to be addressed.
Many floating LVP systems require perimeter clearance around walls and fixed objects. The amount is product-specific, so use the manufacturer’s installation instructions rather than relying on a universal measurement.
A simple click-lock floor in a rectangular room can be manageable for someone with suitable DIY experience. Projects involving damaged subfloors, stairs, several connected rooms, many doorways, difficult transitions, or complicated layouts can require considerably more skill.
This depends on the installation system and manufacturer’s instructions. Some floating floors should not be trapped beneath fixed cabinetry or islands, while other flooring systems may have different requirements. Determine cabinet and flooring sequencing before installation begins.
The amount depends on the room shape, plank layout, installation pattern, and supplier recommendations. Simple rooms usually produce less cutting waste than rooms with angles, closets, stairs, or many obstacles. It is also useful to retain spare planks for future repairs.
Either approach may be possible depending on the project. Existing baseboards can sometimes remain while shoe molding covers the perimeter space, or the baseboards can be removed and reinstalled. Plan the trim treatment before laying the floor.
Some LVP systems can be used on stairs when suitable stair components and installation methods are available. Check for compatible stair noses before buying the flooring because not every collection offers matching stair accessories.
Skipping preparation is one of the most common sources of trouble. An attractive flooring product cannot compensate for a poor subfloor, incorrect moisture conditions, incompatible underlayment, inadequate expansion clearance, or a badly planned layout.