
DIY Garage Workshop Setup: Build A Space That Works
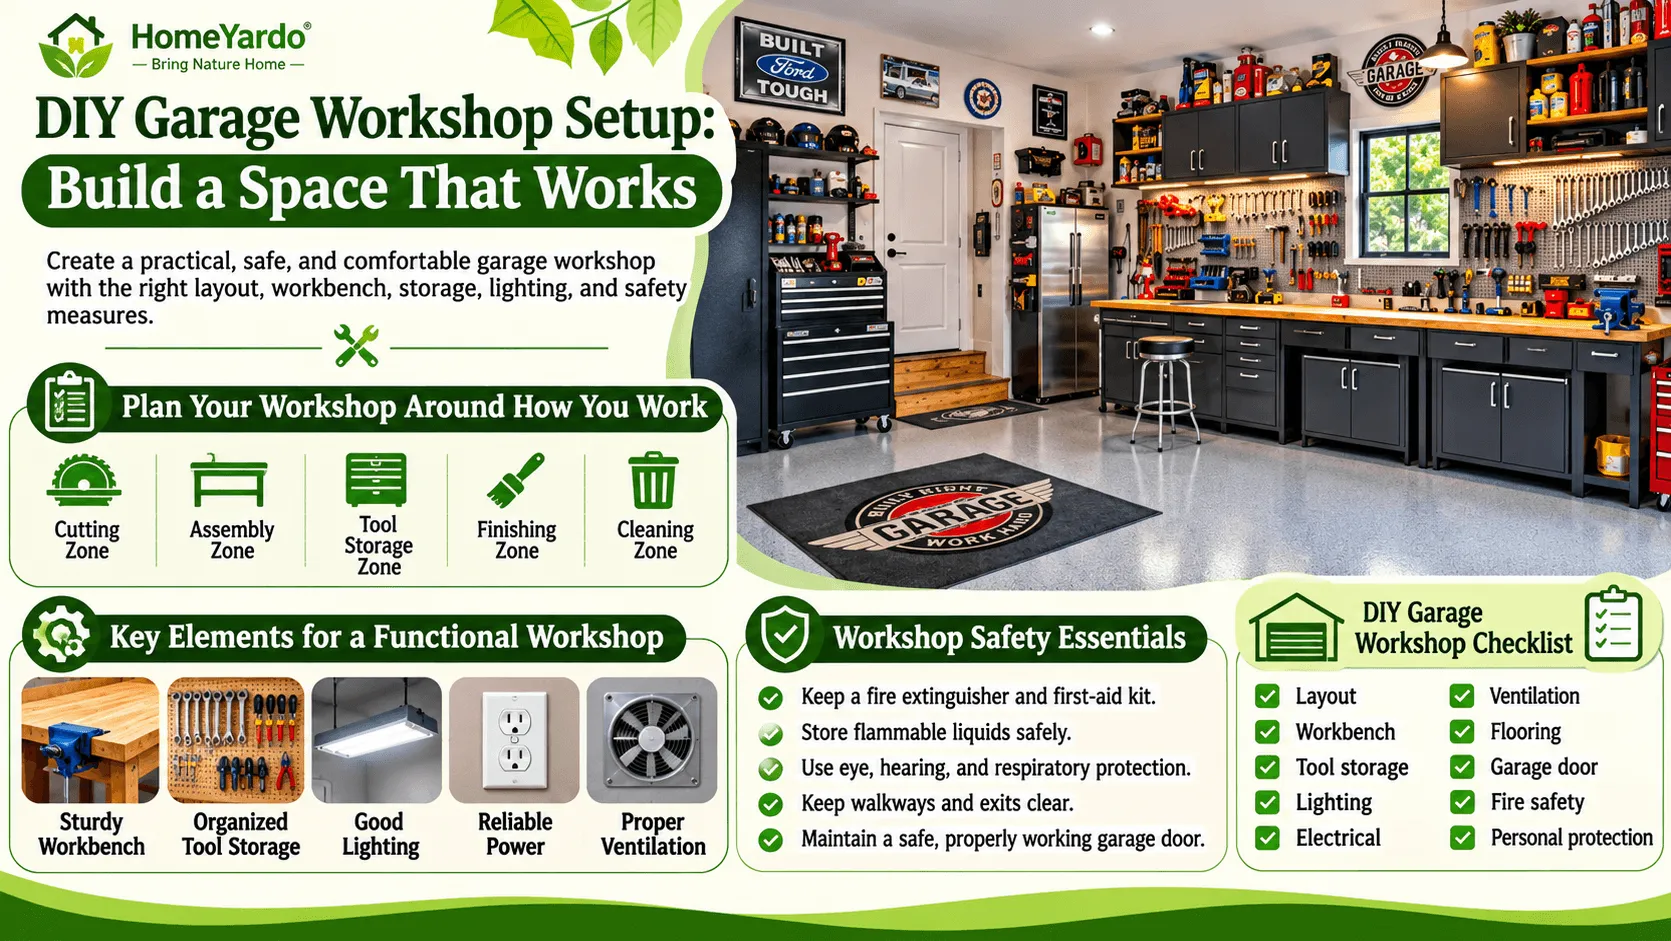
A good DIY garage workshop setup starts with five essentials: a practical layout, a sturdy workbench, organized tool storage, reliable lighting and power, and appropriate safety measures. Get these basics right, and even a small garage can become a comfortable space for repairs, woodworking, and weekend projects.
You do not need expensive equipment or a complete garage renovation to get started. Many useful workshops begin with a simple bench, a few everyday tools, and well-planned storage.
The goal is to create a workspace that supports the projects you actually do. This guide explains how to plan your garage layout, choose a workbench, organize tools, improve lighting and ventilation, and keep the area safe throughout the year.
Plan Your Workshop Around How You Work
The most useful garage workshops are designed around everyday tasks, not showroom photographs. Before buying cabinets or moving heavy equipment, decide what you want to build and how much working space those projects require.
A basic garage workshop should allow you to move safely between tools, handle materials, and clean up without constantly rearranging equipment.
Matching Your Garage Workshop Layout to Your Projects
Different hobbies need different working areas.
Woodworking often requires space for long boards, cutting equipment, clamps, and assembly. Electronics repair and crafting benefit from cleaner surfaces, small-parts storage, and focused lighting.
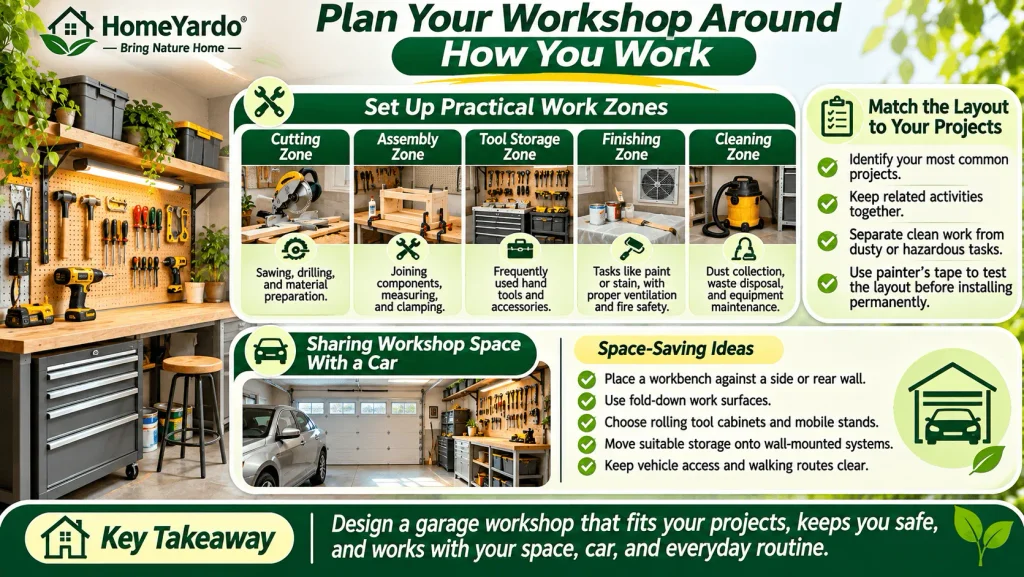
Start by identifying your most common projects and organizing the space into practical zones:
- Cutting zone: Sawing, drilling, and material preparation.
- Assembly zone: Joining components, measuring, and clamping.
- Tool storage zone: Frequently used hand tools and accessories.
- Finishing zone: Tasks involving paint, stain, or surface treatment, with suitable ventilation and fire precautions.
- Cleaning zone: Dust collection, waste disposal, and equipment maintenance.
Keep related activities close together, but separate clean work from dust-producing or hazardous tasks.
Before installing anything permanently, use painter’s tape to mark the proposed locations of benches and equipment on the floor.
Sharing Workshop Space With a Car
A one-car garage can serve as both a parking area and a workshop when the layout allows for both uses.
Measure the vehicle’s footprint with its doors open. Leave enough space for people to enter and exit comfortably, and account for the movement of the garage door.
Practical space-saving ideas include:
- Positioning a workbench against a side or rear wall.
- Installing fold-down work surfaces.
- Using rolling tool cabinets and mobile equipment stands.
- Moving suitable storage onto wall-mounted systems.
- Keeping vehicle access and walking routes clear.
A workshop should never interfere with the garage door, electrical panel, household access, or emergency exits.
Choosing the Right Garage Workbench

Your workbench will probably be the most frequently used surface in the workshop. It needs to support your projects without wobbling, shifting, or taking up unnecessary floor space.
Choose its size, height, and construction according to the work you plan to perform.
Fixed vs. Mobile Workbenches
A fixed workbench is useful for tasks involving repeated hammering, clamping, and hand-tool work.
When properly constructed and securely anchored where needed, it offers a stable surface for demanding projects.
A mobile workbench is more suitable for a shared garage. Locking casters allow you to move it into the center of the room and return it to a storage position when finished.
If space permits, combining a fixed bench with a smaller rolling assembly cart gives you greater flexibility.
Workbench Height and Surface Tips
Many general-purpose workbenches are approximately 34 to 38 inches high, but the best height depends on your body proportions and the tasks involved.
A surface near wrist height can be a useful starting point for general assembly. Detailed work may benefit from a taller surface, while work requiring downward pressure may be easier on a lower bench.
For the worktop, consider:
- Thick plywood for an affordable, durable surface.
- Solid hardwood for demanding work and long-term use.
- Replaceable hardboard for protecting the main surface.
- A vise for holding materials securely.
- Lower shelving or drawers for everyday equipment.
Keep electrical outlets close to the bench without placing cords where they can be damaged or create trip hazards.
A basic DIY bench may cost around $100 to $300 in materials, although prices depend on dimensions, lumber costs, hardware, and local availability. Treat this as a rough planning estimate rather than a confirmed current price.
Tool Storage That Keeps Everything In Reach

Good tool storage is about accessibility as much as appearance. The right system helps you find tools quickly and return them to their proper places after every project.
Instead of buying storage equipment first, organize your tools by how frequently you use them.
Pegboard and French Cleat Tool Storage Ideas
Pegboard is a convenient option for lightweight hand tools such as screwdrivers, pliers, measuring tapes, and small wrenches.
Hooks can be rearranged as your collection changes, making the system suitable for beginners.
French cleat storage uses angled wooden strips to support compatible holders, shelves, and tool brackets.
It offers flexibility for heavier equipment when the cleats, fasteners, wall structure, and holders are designed for the expected loads.
Install frequently used tools near the main bench, but avoid mounting shelves where stored objects could fall onto equipment or moving garage-door components.
Rolling Carts, Tool Chests, and Drawers
Rolling tool chests work well for sockets, wrenches, drill accessories, and smaller components.
Shallow drawers allow you to organize items by category without stacking everything together.
Clear labeled bins are useful for screws, nails, brackets, and other hardware.
Create a designated battery-charging area with suitable electrical protection and follow each battery manufacturer’s charging and storage instructions. Keep chargers away from combustible clutter and damaged batteries.
For further organization ideas, see Garage Storage Ideas to Free Up Floor Space.
Lighting, Power, And Ventilation
Good lighting, appropriate electrical capacity, and effective air-quality controls make a garage workshop easier to use.
These features deserve attention before you install permanent cabinets or equipment.
Garage Workshop Lighting Ideas
Garages frequently have limited overhead lighting, which can create shadows around workbenches and cutting areas.
LED shop lights can provide even illumination without excessive energy consumption.
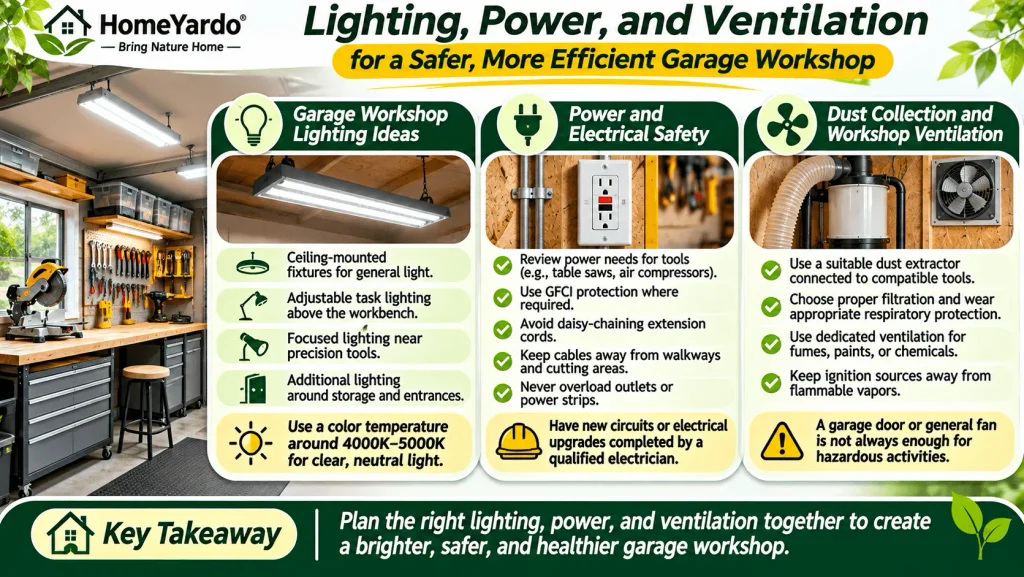
A practical lighting setup combines:
- Ceiling-mounted fixtures for general illumination.
- Adjustable task lighting above the workbench.
- Focused lighting near tools requiring careful positioning.
- Additional lighting around storage and entrances.
A color temperature around 4000K to 5000K can provide a clear, neutral-to-cool appearance for many workshop activities.
Choose fixture brightness and placement according to room size, ceiling height, and the work being performed.
Power and Electrical Safety Basics
Before connecting several power tools, review their electrical requirements.
Equipment such as table saws, air compressors, dust collectors, and electric heaters can place significant demands on a garage circuit.
A qualified electrician can determine whether the existing electrical system needs additional receptacles or dedicated circuits.
Important precautions include:
- Use GFCI protection where required by applicable electrical codes.
- Avoid connecting multiple extension cords together.
- Keep cables away from walkways and cutting equipment.
- Never overload receptacles or power strips.
- Use appropriately rated electrical equipment for garage conditions.
- Have new circuits and electrical panel changes completed by qualified professionals.
Avoid treating an extension cord or portable power strip as a substitute for properly installed permanent wiring.
Dust Collection and Workshop Ventilation
Woodworking, sanding, painting, and some repair activities can release dust, fumes, or hazardous particles.
A suitable dust extractor connected to compatible tools can reduce dust at the source. Ordinary shop vacuums are not always suitable for fine or hazardous dust.
Use appropriate filtration and respiratory protection based on the material being worked.
Opening a garage door or using a general fan does not automatically provide adequate ventilation for solvent-based finishes, welding fumes, or other hazardous activities.
Read product safety instructions, use suitable extraction equipment, and keep ignition sources away from flammable vapors.
Keeping The Workshop Comfortable Year-Round

Extreme temperatures, drafts, and uncomfortable flooring can make a garage workshop unpleasant to use.
A few improvements can help maintain a more practical working environment without requiring a complete renovation.
Garage Workshop Flooring and Comfort
Concrete is a durable workshop floor, but standing on it for extended periods can become uncomfortable.
Anti-fatigue mats can provide cushioning near a workbench. Choose products suitable for workshop use and position them so they do not create tripping hazards.
Interlocking floor tiles may offer additional comfort, although they should be selected with equipment loads, chemical exposure, and cleaning requirements in mind.
If you prefer a more durable finished surface, review the different options in this epoxy resin flooring guide.
Before applying any coating, inspect the concrete for moisture, contamination, cracks, and other conditions that could affect adhesion.
How the Garage Door Affects Your Workshop
The garage door influences airflow, temperature, moisture intrusion, security, and access to equipment.
A poorly sealed door may allow dust, rainwater, insects, and cold air into the workshop.
An insulated door can help reduce heat transfer through the door itself, although overall comfort also depends on the walls, ceiling, weather seals, and ventilation.
If your existing door is damaged, poorly insulated, or no longer suitable for the space, Trusted Garage Door Installation of an appropriate insulated model may be worth considering.
Inspect weather seals regularly, especially along the bottom and sides of the door. For common sealing problems, consult this garage door weather stripping guide.
A garage door that shakes, binds, reverses unexpectedly, or makes unusual noises should be inspected before the workshop is used heavily.
Professional Garage Door Repair may be necessary when mechanical problems affect safe operation.
Never attempt to adjust or remove garage-door springs, cables, or other high-tension components yourself.
Workshop Safety Checks You Shouldn’t Skip
An organized workshop is easier to maintain, but organization alone does not eliminate hazards.
Tools, electrical equipment, dust, chemicals, and moving garage doors all require appropriate precautions.
Fire and Electrical Safety
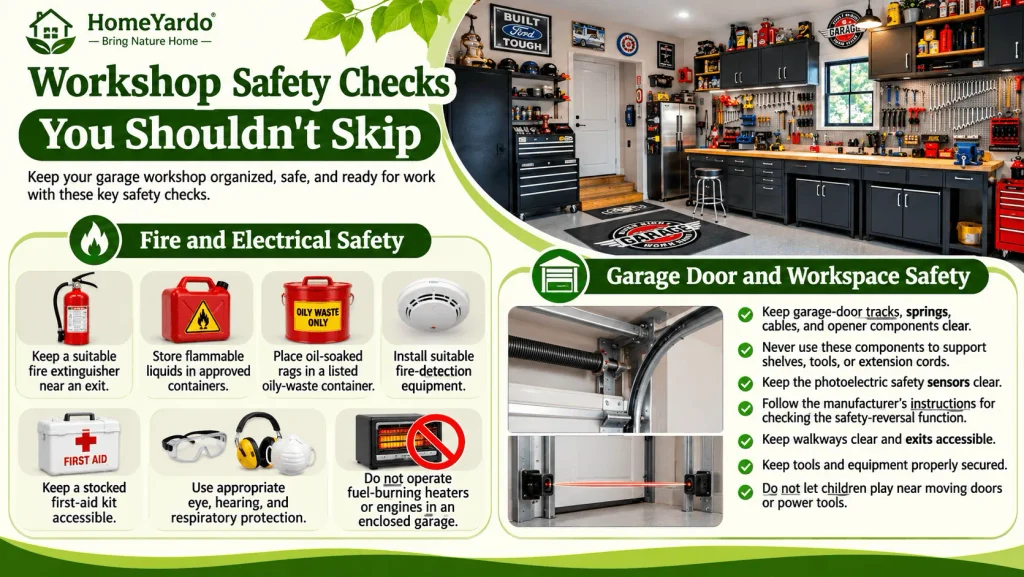
Keep a suitable fire extinguisher near an accessible exit and make sure everyone using the workshop knows its location.
Choose the extinguisher according to the hazards present and local fire-safety guidance.
Other precautions include:
- Store flammable liquids in approved containers.
- Keep chemicals away from heaters and ignition sources.
- Place oil-soaked finishing rags in an appropriate listed oily-waste container and dispose of them according to product instructions.
- Keep a stocked first-aid kit accessible.
- Use appropriate eye, hearing, and respiratory protection.
- Install suitable fire-detection equipment in accordance with local requirements.
Avoid operating fuel-burning heaters or engines in an enclosed garage. Carbon monoxide can accumulate rapidly, even when the garage door is open.
Garage Door and Workspace Safety
Garage-door tracks, springs, cables, and opener components should remain unobstructed.
Never use these components as supports for shelves, tools, or extension cords.
Keep the photoelectric safety sensors clear and follow the manufacturer’s instructions for checking the door’s safety-reversal functions.
Do not let children play near moving doors or power tools.
Clear walkways, accessible exits, and properly secured equipment reduce preventable accidents.
For routine inspection tasks, use this garage door maintenance checklist.
DIY Garage Workshop Setup Checklist
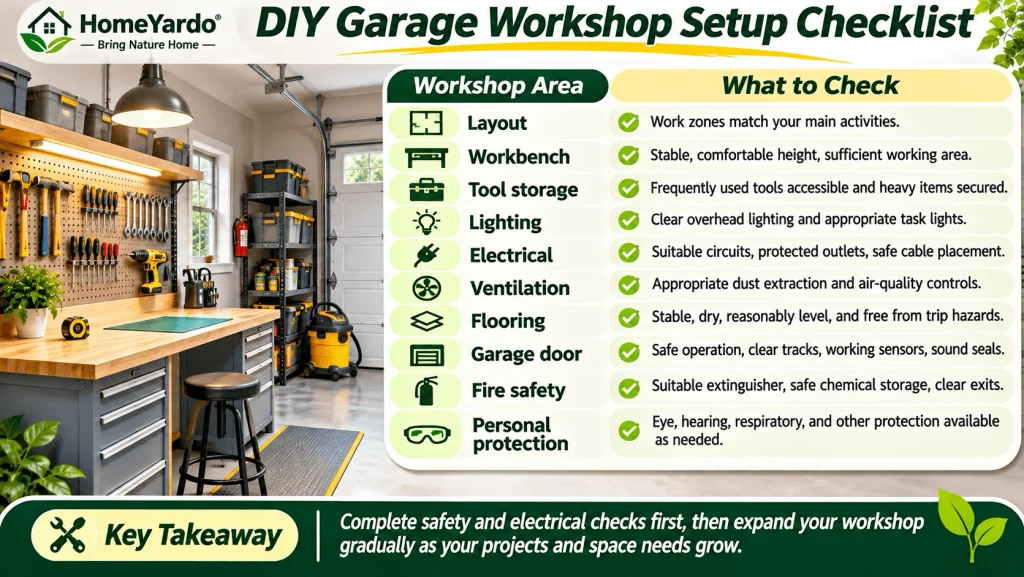
Before starting your first project, review the workshop to make sure the essential areas are ready.
| Workshop Area | What to Check |
|---|---|
| Layout | Work zones match your main activities |
| Workbench | Stable, comfortable height, sufficient working area |
| Tool storage | Frequently used tools accessible and heavy items secured |
| Lighting | Clear overhead lighting and appropriate task lights |
| Electrical | Suitable circuits, protected outlets, safe cable placement |
| Ventilation | Appropriate dust extraction and air-quality controls |
| Flooring | Stable, dry, reasonably level, and free from trip hazards |
| Garage door | Safe operation, clear tracks, working sensors, sound seals |
| Fire safety | Suitable extinguisher, safe chemical storage, clear exits |
| Personal protection | Eye, hearing, respiratory, and other protection available as needed |
Complete the safety and electrical checks before introducing larger equipment.
You can expand the workshop gradually as your projects and available space change.
Final Takeaway: Build a Garage Workshop That Works
A successful garage workshop does not depend on owning expensive tools or filling every wall with storage.
Start with the projects you regularly complete, create a workable layout, choose a stable bench, and keep the tools you use most within easy reach.
Plan electrical capacity, lighting, dust control, and safety measures before committing to permanent installations.
Remember that the garage door is part of the working environment. Its condition can affect access, weather protection, and safe movement around the space.
If your door requires professional attention, Bradbury Garage Doors may be an option to consider for relevant installation or repair services.
With sensible planning and regular maintenance, your garage can become a useful workshop that adapts to your needs.
FAQ’s
A basic workshop needs a stable workbench, suitable tools, organized storage, reliable lighting, safe electrical access, appropriate ventilation, and essential safety equipment. Start with what your regular projects require.
Use wall-mounted storage, a compact workbench, mobile tool cabinets, and fold-down surfaces where appropriate. Measure vehicle clearance and keep doors, exits, and electrical panels accessible.
Many general-purpose workbenches measure around 34 to 38 inches high. The most comfortable height depends on your body proportions and whether you mainly assemble, cut, or perform detailed tasks.
Costs depend on the tools you already own, bench materials, storage equipment, electrical work, and lighting. A basic setup can begin with a modest budget, while major electrical upgrades and specialized machinery can increase expenses substantially.
A combination of evenly distributed LED ceiling lights and adjustable task lights works well for many workshops. Fixtures should illuminate the work surface without creating distracting shadows.
Use appropriate dust collection or local exhaust equipment for the work performed. General ventilation may help with comfort, but hazardous dust and chemical fumes can require specialized controls.
An insulated garage door may improve comfort by reducing heat transfer through the door. Its benefit depends on the insulation and air sealing of the rest of the garage, climate, and how frequently the door is opened.
Yes, if the garage provides sufficient space for safe vehicle access, equipment storage, and working clearances. Mobile tools and fold-down benches can help keep the parking area available.